UPDATED 22/11/18
For some time now I have had an "improved version" of the "connection box" shown in this blog page.
It consists of 20 chassis mounted stereo sockets, fixed into a "plastic conduit" box as used for mounting electric cables in buildings..
The sockets are mounted on the "loose" capping, so that the backing can be permanently fixed to some point on the desk/wall
I now have 15 straight keys attached to my USB to Serial Converter in this manner ! ..
 | |
| Showing the new "connection rail" at the top of the picture |
Since I "accidentally" started collecting and refurbishing morse keys. I have acquired quite a few. Rather than just have them on display, I wired them all up through a connection box, so that I could use any one of them at any time "immediately" on CWCOM. ... To have them "ready for use" I had made an exteded shelf that sat on the top of the top drawer of my "operations centre".. When they were first laid out, they looked really cool... however, it only needed me to use three or more and the cables got all tangled up... and also, because they were immediately in front of my two receivers, it meant I had to move the keys, or not use the receivers!... it was easier to not use the receivers, but still a problem existed with the tangled leads...
 | ||
| This is how the "operations centre" looked before work started. |
 | |
| As can be seen, a tangled mess, and no way to use the radio`s |
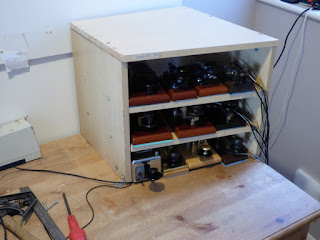
I decided that I needed something radical to solve the problems of both operations... and the only way I could see that, was to rebuild the "operations desk" and put the radio`s on the left side, and the keys in the shelf units on the right side... I also figured out a way to make the cables retract, so that when a key was returned to the shelf, it was nice and tidy ... A couple of weeks ago, I decided to "bite the bullet" and make a start on it, little knowing the amount of work that was involved.....!
The first thing to do was to remove everything from the desktop, and dismantle the shelf units... Initially, I was just going to "swap them over"... but when I did a trial, it did not look right..
 |
| First attempt at re-shelving the keys - not very nice ! |
so I had a mid rebuild crisis, and did some re-designing.
It is not obvious from first looking at the layout, that the shelves with the radios in them are wider than the "mirror image" shelves on the left side of the desk... This meant that I had to resize all the wood shelving, and the vertical supports, so I cut off 4 inches (200mm) from the back of each shelf, and support, and then tried out a new shelf layout for the keys... didn`t like it being a "box" unit... and thought that a "sloping frontage" would be more appealing, and also eaiser to use the keys and return them.. at the same time, keeping them "on display".. I had to play around with some angles, but eventually it all worked out well...
 | |
| The final solution..... looking much better ! |
To make the key cables "auto retract" on returning a key to its location, I purchased some extra long "line jack extension leads" ( this saved me having to solder on new jack plugs to each lead,) .... I then drilled some 1" ( 25mm ) holes in the back of the shelf units to allow the cables to be passed through on their way to the "connection box"
 |
| Connection Box showing coloured bands for key I.D. |
I also purchased some coloured rubber bands or "loops" that kids use to make bracelets with,... and these I used in various combinations to identify the jack plug to the key, in case I wanted to remove a key for maintenance or use /p .... Behind the desk, the cables form a loop and on the loop I have hung 2 x 4oz fishing weights or "sinker" weights... on a ring, one each cable,
 |
| Each weight is 4oz, so two of them to one cable. |
so that when the key is drawn out, the weight is lifted up, and as the key is returned, the weight will drop and keep the cable tidy, in effect "auto-retracting" ! ! .. ( I had to use two weights to each cable, because of the "stiffness" of the cables, however, if lighter, more flexible, cable were used, 1 weight per cable would probably do the job)....
Working on the "radio shelves" was a bit easier, as all I had to do was to "invert them" to reverse the sloping frontage from right to left and cut the 4" (200mm) from the back of the shelves and vertical supports, and re-fit them. Re-routing all the aerial ( antenna ) wires and power cables, not to mention the switched selector box and the aerial selector box too ! !..
The whole exercise took me over 16hours work over three days, to complete.... and I was absolutely shattered when it was finally done...but it has been worth the effort, and backache ! ! .. now I have 4" ( 200mm ) wider desktop space,... I can use my keys and keep them tidy,... but best of all, I am now using my radio`ss more than I have ever done over the past couple of years !! .. I`ve even invested in a new Discone Antenna for the VHF band on the Yaesu FRG 8800. and that is going to be installed on the chimney stack to improve my 2mtr and other VHF reception.
The New Improved Operations Centre Completed. ! ! !


No comments:
Post a Comment