
My latest one was advertised as Ex-R.A.F. but I am not so sure that it is... this is what it looked like when it arrived ...


As you can see, it looks forlorn, and dishevelled, dirty, and unloved... so I took it down to my workshop, and started to take it apart.... taking photo`s along the way, so I would know how to put it back together again, once I had finished..
First of all, I removed all the screws and knurled nuts,and removing the rocker arm, being careful about the tension spring underneath the rocker arm.... This part makes me think it is "home brew" because the spring looks like it is snipped with a pair of pliers, and not a "commercial" type flush end.... also there is a small copper round headed rivet, that fits inside the spring, and resides in a cavity underneath the screw tensioner, on the rocker arm...

The next part was to unscrew the bakelite base from the oak base, and again... the screws seemed to have been "shortened" with pliers, rather than "correct size" which would have been fitted in a manufacturing factory made item.

With the skeleton now removed, I could access the screws underneath the bracket pieces... and another point here. two roundhead screws were used to fix the central rocker arm support....and these needed recesses into the oak base... again.this would not have been done in a factory envirnoment. probably the guy who made the key , did not have enough countersunk screws ! ! !..

The oak base looked very dirty, but it cleaned up with a bit of spit and polish.... YES ! . literally... !.. so the varnish must have been protected by the grime !.. although I did not use any polish... just the wet cloth, and some elbow grease...

And then it was time to get all the bits and pieces cleaned up.. I used some fine wet and dry to clean up the rocker arm... and then used a rotary wire brush, very lightly on all the screws and knurled nuts... held firmly in the vice on the bench... the metal brackets were given a light wire brushing where the contact threads are, but the flat surfaces were given a rub down on the wet and dry paper... It was used dry, as there was no real dust problem..
Once all the bits and pieces were looking good, it was time to refer to the pics on the camera, as I began to put it all back together again...It was a bit tricky trying to keep the spring with the rivet in it, in position whilst trying to re-locate the rocker arm, and insert the side screws for the pivot point.... but once that had been done, it was plain sailing.. Of course, I had to have a "spark guard" so that I can send with it. I think it "adds" to the beauty of this key as well as being practical.... and the whole job took just under 2 hours...
Below, is Before and After views......


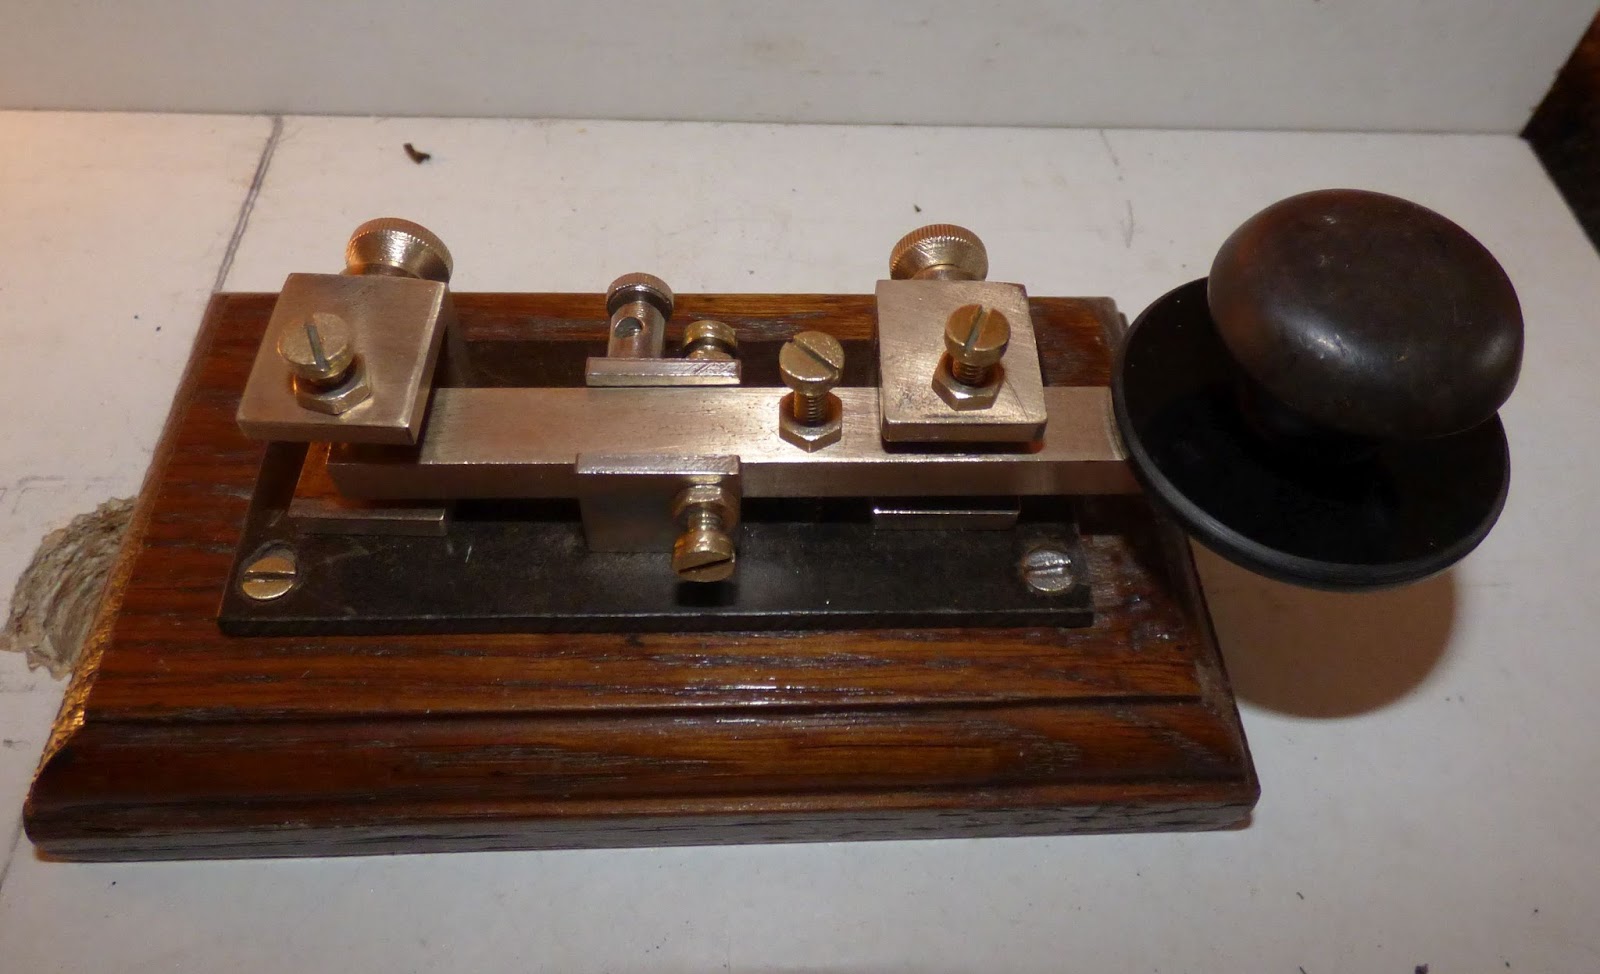
On completion of the rebuild, I guessed the gap setting, which is done by either of the screws on the top of the front and rear brackets...but I set it on the rear one, and used the front one as a "stop".... when I got back indoors, I switched on CWCOM and plugged in the key... tightened up all the lock nuts, and away I went.... a real joy to use... very smooth in operation and makes good morse.
So, I am well pleased... Oh, by the way, it cost me just under £21.00 including delivery, so another bargain key to add to my collection of 10 straight keys
Here is a short video of me sending with it....
It looks like a operator-modified WT 8 AMP Key.
ReplyDeleteNo, it isn`t... I have seen at least 4 others, exactly the same.. It is "about" the same size as a WT8amp, but none of the variations of the WT 8AMP keys have anything in common with this particular key.
Delete